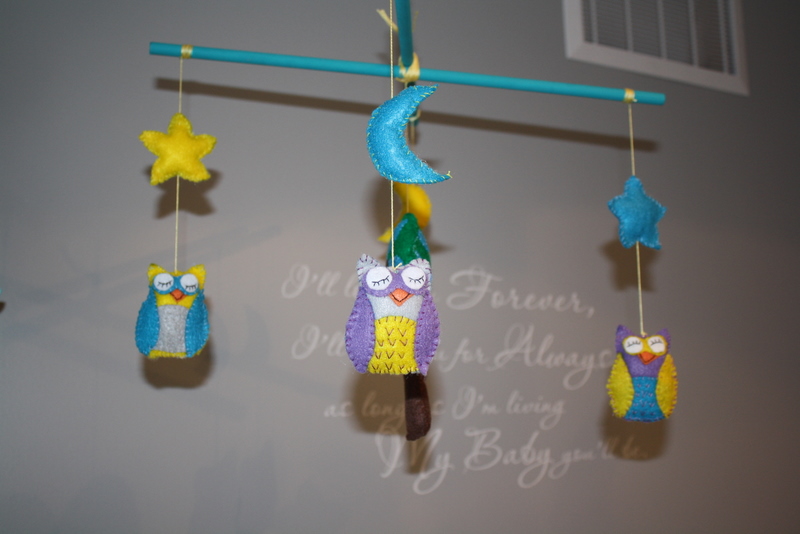
I finally took some pictures of my finished owl mobile.
I got the idea on pinterest from homemadebyjill.blogspot.com
I also made a jungle themed one for a friend but forgot to take pictures so I'll have to get some next time I'm over there.
Only 8 more weeks to go until baby gets to enjoy this room!
Saturday, 11 February 2012
Monday, 23 January 2012
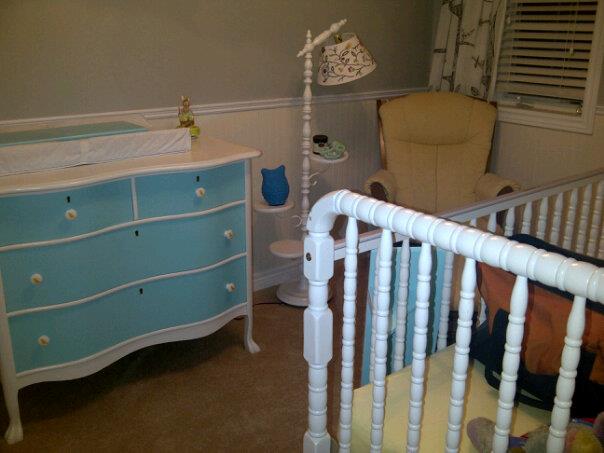
Baby's room so far
Here are some pics of the baby's room. We are almost done. I finished the mobile last night and hopefully we'll hang it this week. Hubby still has to dap and paint the trim work but after that we're finished! Sorry about the picture quality. These were taken on my cell phone. Better ones to come...
Sunday, 15 January 2012
Change table update
Well I had to re-paint the baby's changing table as we tried to put some varnish on it and it turned yellow. I also wasn't in love with the finish of the paint so we took a trip to Rona and bought some Sico furniture and cabinet paint in white. I also bought some in Amalfi Coast and this is how it turned out...
I like it a lot more! Plus it works better for a boy or a girl since we don't know what we're having. I highly recommend this paint as it goes on really smooth and it's super durable.
We're getting there with that room but have also been busy painting much of the rest of the house. Hopefully I will be able to post a picture tour of the finished house before our early April due date.
Also, big congrats to our friends Cate and Ian who just welcomed baby Audrey yesterday! I can't wait for our little person to meet yours!
I like it a lot more! Plus it works better for a boy or a girl since we don't know what we're having. I highly recommend this paint as it goes on really smooth and it's super durable.
We're getting there with that room but have also been busy painting much of the rest of the house. Hopefully I will be able to post a picture tour of the finished house before our early April due date.
Also, big congrats to our friends Cate and Ian who just welcomed baby Audrey yesterday! I can't wait for our little person to meet yours!
Monday, 2 January 2012
Baby's room hanging light re-do update...
My lovely mother finished the lamp shade for me using the Ikea curtains I bought for $20. It took us a little while to figure out how to hang it but it is up and looking very cute.
Here's the before...
And the after...
One more step in the hallway transformation...
Rob and I decided to postpone our little one night trip to the U.S. in exchange for getting some painting done in our hallway on our holiday week off. We went with Benjamin Moore's Inukshuk and it turned out really beautiful. The only problem was once we painted the walls the brass builder grade door knobs really stuck out like a sore thumb! Rob went to Rona and found out just a plain black knob was going to be over $10 and you still had to buy the hinges so I referred to my Pinterest page and found a blog I had pinned that showed how to spray paint your existing knobs. We bought a $10 can of Rustoleum's Oil Rubbed Bronze and Rob set to spraying. So far we are loving the results and the savings! It's a tedious job and there are still 10 more doors to go in our house but it really makes a difference in the hallway.
Here's the before...
And the after...
Tuesday, 20 December 2011
Finally the great reveal!!
I know it's been way more than the month I anticipated but with being pregnant and having to leave the house overnight every time stain and varnish was involved this project had to be done in stages. Finally the railing is finished!!! We are so happy with it! Yes it was a lot of hard work but if you're thinking of doing the same it is totally worth the effort. Next step: painting the ugly builder's "white" walls with Benjamin Moore's Inukshuk .
Just a refresher...here's the before:
And the beautiful after!!
Wednesday, 7 December 2011
Brass chandelier gets a new rustic look
Here is my latest little project...I saw this idea in Pinterest at blog.addicted2decorating.com . I found a brass chandelier on kijiji for $15 and had hubby spray paint it with Rustoleum Shell White. Then I wrapped the arms with jute twine from the dollar store. I secured the twine with a small bit of hot glue and did that occasionally as I wound the twine to make sure it holds. After the twine was finished I used the side of a craft paint brush and some black craft paint and lightly added some black around some of the edges to give it a bit of a worn look. As I already had the paint, my total expenses were about $17 ($15 for the chandelier and $2 for the twine). Hubby isn't sold on it yet but I love it's rustic look. What do you think?
Before Picture
After pictures
Subscribe to:
Posts (Atom)